Showing posts with label DIY. Show all posts

Tuesday, July 3, 2012

DIY: fabric bunting

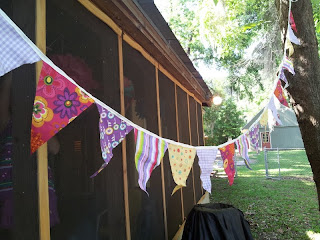
my sweet sweet niece's birthday party was the other weekend and she asked me to help with decorations.  I'm really loving bunting right now (well, really for the last few years) so I figured I'd do a tutorial on how to make a fabric bunting (so it will last and she can hang it in her room after the party)

I gathered up some fabric scraps, cut a triangle template out of card stock, grabbed a spool of ribbon (not shown) and pulled out the old sewing machine (also not shown)

ignore the glue gun... he's such a ham trying to get in all my crafting pictures.

using the card stock template, I cut out 18 triangles.  If you want it to look really super awesome and nice, iron your fabric.  I hate ironing so I just let it be wrinkled and called it rustic.
See it's easy to call things rustic or organic just by being lazy!!

pulled out a couple of feet of ribbon and then started folding it in half over the top of the triangles and sewing it.  If you're not a sewing kind of person, I suppose you could give the glue gun a little action.  Just be careful!!  Depending on your fabric and your tolerance for pain, the heat may burn you!!!

beauty!


Tuesday, June 26, 2012

DIY: how to resize a tee

I got a couple of new shirts for work the other day (we have to wear shirts with our logo) and even after I washed them, they fit me like a maternity shirt.  Pretty awkward I must say.  So I figured I'd make them fit me better AND show you how to to do it, too!

Turn your shirt inside out and lay a shirt that fits you how you like on top of the shirt to be altered.
Then mark the outline of the fitted shirt onto your new shirt.
*the sleeves of my shirt fit just fine, so I only altered the sides and left the sleeves alone.

Sew along the marks that you made onto your shirt.

Cut along the edge of the stitch.

I added a zig zag stitch for sturdiness.  If you have a serger, serge away!!

done in less than 15 mins.
Now you know where I work.
Please don't stalk me.


Wednesday, June 13, 2012

DIY: keep your duvet in place!

our duvet slides around in it's cover.  it drives the mister completely mad.  so I took it upon myself to do a little something about it. here's how it went down....

duvet, scissors, ribbon, sewing machine

first, let the cats assess the situation.

kitty cats approve.

cut 4 strips of ribbon (about 5 inches long)

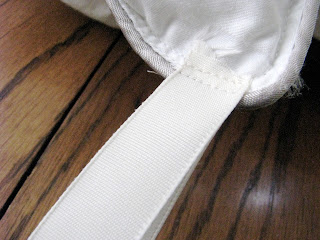
fold ribbon and sew a loop on each corner.

then add loops about half way from the edge to the center on each side.
this should give you four loops across the top of your duvet.

like so.

cut four more strips of ribbon (about 8 inches long)
*kitty paw optional

turn duvet cover inside out and place it on top of your duvet and mark where your loops are.

fold your ribbon strips and sew onto your marked spots on the cover.
not a loop.   you want to be able to tie these.

okay this is pretty much it... tie and cover that duvet!!

now everyone is sleeping better!

Wednesday, May 2, 2012

DIY number one cake topper

photo props are easy to make and can make your photo shoot more exciting.
here is a tutorial on how to make an easy cake topper.
(you could do this with any number letter or simple shape)

use card stock to trace or draw a number one.

cut them both out.

place a skewer, popsicle stick, lollipop stick, or whatever you have on hand that may emulate one of this items.  I twisted some craft wire and used that.  boom!

mod podge + glitter = FUN!

voila!  reusable and super cute for a first anniversary photo shoot!

Tuesday, April 24, 2012

DIY felt/fabric hair clip


what you need:
felt, fabric, button, barrette or clip, hot glue, pinking shears

cut two squares of felt with pinking shears (I fold the felt in half to cut), then cut one square of fabric slightly smaller.

hot glue the two pieces of felt together and then the fabric on top

hot glue button on top of fabric... I hope you haven't burnt yourself yet!!

hot glue fabric to barrette.

you did it!

I wore this to a St Patty's Day party.  People loved it.

Friday, March 9, 2012

DIY deck of cards book

yeah I'm still anniversary-talkin' (still a couple more DIY's to come on that as well), but this is something you can do anytime!

So here's how it went down.

get a deck of cards (it should be 53 cards including the joker)

punch 2 holes in the side of each card (use your first card as a template for the rest)
aw.  my holes are hearts.
*I only own a heart shaped hole punch

print on card stock (or plain paper would work)
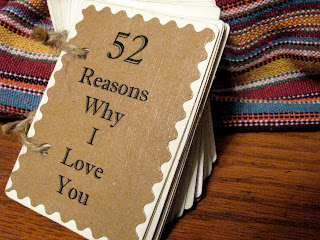
the title of my book and a special message for the inside cover

cut your title and message out and mod podge, baby!

oh!  someone broke out the fancy scissors!

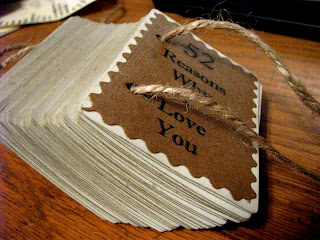
so you come up with 52 reasons why you love your loved ones and you print each reason out (on card stock or plain paper).  I also mod podged scrapbook paper onto each card (and then repunched my holes)

I hope your printer is working... or that you have one.
Now we print the page numbers.  I chose a few different fonts just for funsies!

mod podge the whole card after you've put everything on it.  This seals it nicely.

let cards dry.

I was going to go buy some rings to put through the holes but I ran out of time and the craft store is so far away (waaaah).  So jute twine it is!

tie it, snip it, done.

so sweet.
and I was able to say that I gave a paper gift for anniversary #1

Tuesday, February 14, 2012

DIY felt heart clip

ah... in the spirit of Valentine's day and all things heart-shaped, I've decided to give a hearty DIY.

cut out 2 felt hearts.
I did this freehanded, but if your freehanded heart is wonky, click here.

using a contrasting thread color, sew your hearts together.

it should now look like this.

bust out your hot glue and a clip.
glue clip on diagonally... or however you like.
I like diagonal.

boom.
clip it on.
it would be a super cool hair clip, too!