Showing posts with label crafts. Show all posts

Wednesday, June 13, 2012

DIY: keep your duvet in place!

our duvet slides around in it's cover.  it drives the mister completely mad.  so I took it upon myself to do a little something about it. here's how it went down....

duvet, scissors, ribbon, sewing machine

first, let the cats assess the situation.

kitty cats approve.

cut 4 strips of ribbon (about 5 inches long)

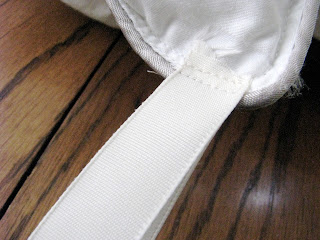
fold ribbon and sew a loop on each corner.

then add loops about half way from the edge to the center on each side.
this should give you four loops across the top of your duvet.

like so.

cut four more strips of ribbon (about 8 inches long)
*kitty paw optional

turn duvet cover inside out and place it on top of your duvet and mark where your loops are.

fold your ribbon strips and sew onto your marked spots on the cover.
not a loop.   you want to be able to tie these.

okay this is pretty much it... tie and cover that duvet!!

now everyone is sleeping better!

Wednesday, May 30, 2012

we painted our piano!

The mister got this piano from a local church while we were still dating.
It was pretty ratty so we decided to paint it... green.


now it's much more fun to play!

Wednesday, May 2, 2012

DIY number one cake topper

photo props are easy to make and can make your photo shoot more exciting.
here is a tutorial on how to make an easy cake topper.
(you could do this with any number letter or simple shape)

use card stock to trace or draw a number one.

cut them both out.

place a skewer, popsicle stick, lollipop stick, or whatever you have on hand that may emulate one of this items.  I twisted some craft wire and used that.  boom!

mod podge + glitter = FUN!

voila!  reusable and super cute for a first anniversary photo shoot!

Friday, March 9, 2012

oscar loves the number one.

even if it's backward.

maybe because he is number one.

(more on this craft project next week!  whoop whoop!)

DIY deck of cards book

yeah I'm still anniversary-talkin' (still a couple more DIY's to come on that as well), but this is something you can do anytime!

So here's how it went down.

get a deck of cards (it should be 53 cards including the joker)

punch 2 holes in the side of each card (use your first card as a template for the rest)
aw.  my holes are hearts.
*I only own a heart shaped hole punch

print on card stock (or plain paper would work)
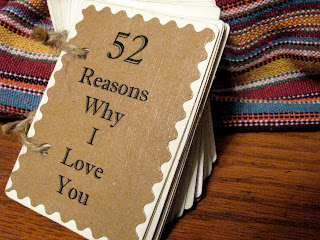
the title of my book and a special message for the inside cover

cut your title and message out and mod podge, baby!

oh!  someone broke out the fancy scissors!

so you come up with 52 reasons why you love your loved ones and you print each reason out (on card stock or plain paper).  I also mod podged scrapbook paper onto each card (and then repunched my holes)

I hope your printer is working... or that you have one.
Now we print the page numbers.  I chose a few different fonts just for funsies!

mod podge the whole card after you've put everything on it.  This seals it nicely.

let cards dry.

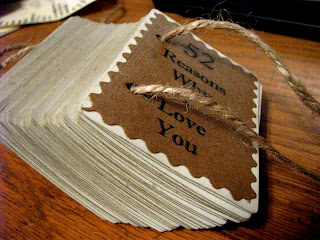
I was going to go buy some rings to put through the holes but I ran out of time and the craft store is so far away (waaaah).  So jute twine it is!

tie it, snip it, done.

so sweet.
and I was able to say that I gave a paper gift for anniversary #1

Wednesday, March 7, 2012

anniversary gifts are fun.

My sweet friend Bethany made this awesome frame for us for our anniversary.

I love it.

she kept several different paper elements from our wedding and decoupaged them onto a frame.

this is from our programs.

so is this... she also used our invites, our cd inserts (these were favors),  and leftover burlap from bridesmaids clutches I made.

thanks, sweet Bethany!!  You're the best!

Tuesday, February 7, 2012

DIY chalkboard labels


So the local craft store was having a glass sale and I got these glass canisters for a steal of a deal!!

but something was missing.
they seemed so naked.

I happened to have a sheet of labels sitting around waiting to be used so I decided to put them to good use.

lightly spray the labels with chalkboard paint.  let dry.  repeat.  repeat.  repeat.
yes.  it took 4 coats.

chalkboard painted labels.

they were a little large for my canisters so I cut them into squares.

super cool, inexpensive project (especially if you already have chalkboard paint)


Thursday, February 2, 2012

happy february!!

My awesome friend Amanda (who kinda needs to update her blog... just sayin') invited me over the other night and we made heart wreaths.

don't judge the lopsided heart... he needs love, too.

Amanda is the scrapbook paper queen.  I thought I had a lot.  She wins.

inspired by this pin

Tuesday, January 24, 2012

wedding picture project


Mister got me this distressed frame when we got married and it has been so naked for the past 10 months so I decided to dress it up.

I used Picnik to edit some of our wedding pics into a cool retro black and white, then I cropped them into squares.

It cost less than $5 (including shipping) to print them on Shutterfly as 4x6 prints (not bad considering some other sites who would charge at least $1 per print.  I had 16 printed.)

Still have a ton of leftover jute twine from the big day.

yay!
cutesy pootsy!